Penny Pinching Peach

For the semi crunchy, homeschool friendly and totally frugal!


Leave a comment

Learning Gratitude Through Life Changes

From wrecked and molding house to new house, one of many changes we are grateful for!

Learning gratitude through life changes  (like full time rving and building our own home)!

The past three years have been full of trials & triumphs, changes & difficult lessons.

We have grown as individuals and as a family in ways that we never imagined. One thing is that we have become so much more grateful for and aware of the every day blessings we had just taken for granted for so long!

“Penny Pinching Peach is a participant in the Amazon Services LLC Associates Program, an affiliate advertising program designed to provide a means for sites to earn advertising fees by advertising and linking toAmazon.com” May also include other affiliate links to help my family while helping yours!

Feeling safe.

We moved from a safe and familiar area to a different state in an area where we knew nobody. We took a place from just woods to a double wide and homestead. We discovered that our neighbors were hostile, racist and liked to run a  burn barrel full of rubber coated wire 24/7 (which caused us health issues).

Glossing over that saga to say that it led us to living full time in our camper in order to escape being terrorized. Feeling safe in our home is sooooo much more important to us than what and where it is!

Full sized anything.

In a camper, everything is shrunken down. The fridge, the stove,  the microwave, the sinks, the couch, the table, the shower, the toilets, the rooms….everything is smaller! Yes, it can be cozy and less to maintain. I loved some things, but mostly I missed my normal.

I was especially excited when I got a shower with a tub again,  so I could take a real shower without rushing to keep from losing hot water and my children could play in the tub! Also, last night I finally got my real full sized oven going, and I am over the moon to be able to bake cookies and make many dishes I have been unable to for a very long time!  (I have been using a hot plate, my trusty red toaster oven and my old reliable Hamilton Beach Slow Cooker since we moved into our house in October. )

Having enough.

We have been through some of the worst financial times of our entire lives during this time frame.

There have been weeks where $10 had to get groceries, because that was all that was left after our bills were paid. We had to humble ourselves and ask for help in ways we never would have considered before.

I am so grateful now for the times when I can walk into the store and get everything on my list! The many weeks I stood there almost in tears trying to figure out which “necessities” were the most necessary have made the weeks of a plentiful cart feel so amazing!

My knack at being frugal.

It would be nearly impossible as a big spender to live the life we have been leading. For a natural born penny pincher like myself, it’s like a prolonged marathon I have had a lifetime of conditioning for. Not easy, by any means, but we survive!

Human kindness.

I have had many times these past three years where I felt alone in a dark place, and someone stepped in with some act of kindness that renewed my hope.

There is so much power in simply allowing yourself to be used to bless someone,  even in small and seemingly insignificant ways. I am grateful to those who showed and continue to show kindness to my family in unexpected ways.

Health.

My son was in a serious accident a couple of years ago, and my husband in a car accident this past year. Both have permanent scarring.  Both could have been so much worse! We are so very glad to have them both healthy and with us!

Home.

I don’t do well feeling unsettled. I need a place to feel comfortable and at home. I am so grateful to have that now! There’s no place like home!

I would never have chosen to experience all the difficulties we have went through.

Honestly, I still wouldn’t chose them. However, we can choose to grow stronger and better from trials or we can choose to become bitter and self pitying. I choose gratitude in the blessings of life and hope that things can always get better!
What are some lessons you have learned through trials? Going through a dark place now? Read and be encouraged that you are not alone!


8 Comments

Make Your Own Attractive Topsy Turvy Planter


DIY Topsy Turvy Tomato

DIY Topsy Turvy Tomato

I know most of you are familiar with the fad of topsy turvy tomatoes. The bags they made for the purpose just didn’t appeal to us that much for using over & over, so we decided to make our own.

“Penny Pinching Peach is a participant in the Amazon Services LLC Associates Program, an affiliate advertising program designed to provide a means for sites to earn advertising fees by advertising and linking to Amazon.com”

There may be other affiliate links, which help my family while sharing deals with you! 

We loved them so much, we re-use them every year. They last much better for multiple uses than the bag style you can get at the store, like these  Upside down Tomato Planter (2 pack). The kind you can buy work fine, we just preferred choosing our colors, shapes and sizes and something that would last more than a season or two. We did try the popular kind, and they worked well, so if you want to take the lazy way out 😉 , order a set!

The best plant we have found to grow in these planters is cherry tomatoes.

⇒⇒⇒ PIN HERE ⇐⇐⇐

Order non GMO seeds and supplies using the coupon code SAVE10NOW for 10% off at SeedsNow!

They do amazing grown this way, and hanging from our porch nearly to the ground and covered with sweet edible jewels. We much prefer this, since it looks nice and takes up no space we need, instead of taking of bakoodles of space in our fairly small garden plot! We tried regular tomatoes and various peppers, but they seem to do better when grown more conventionally than in the topsy turvy method.
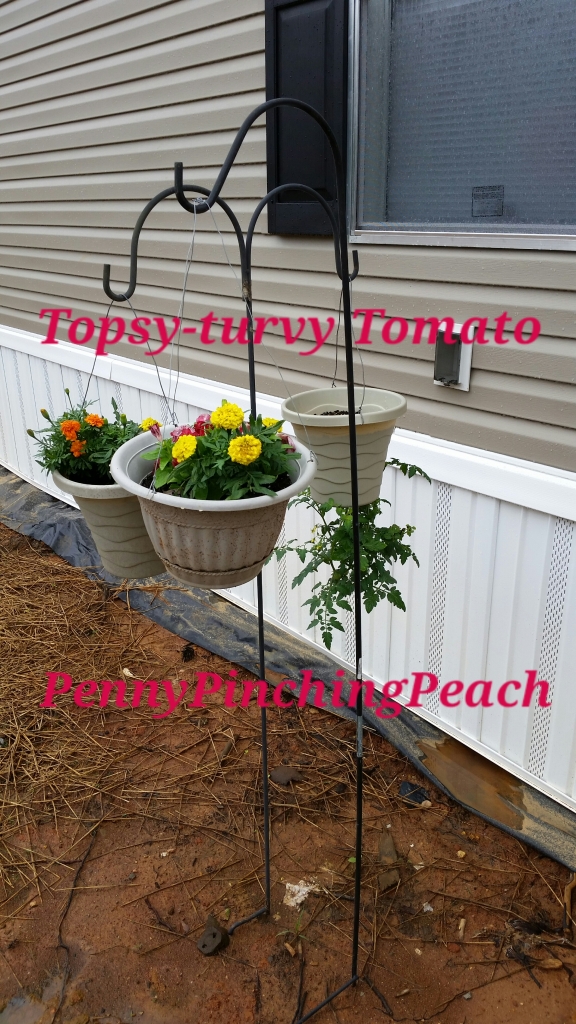
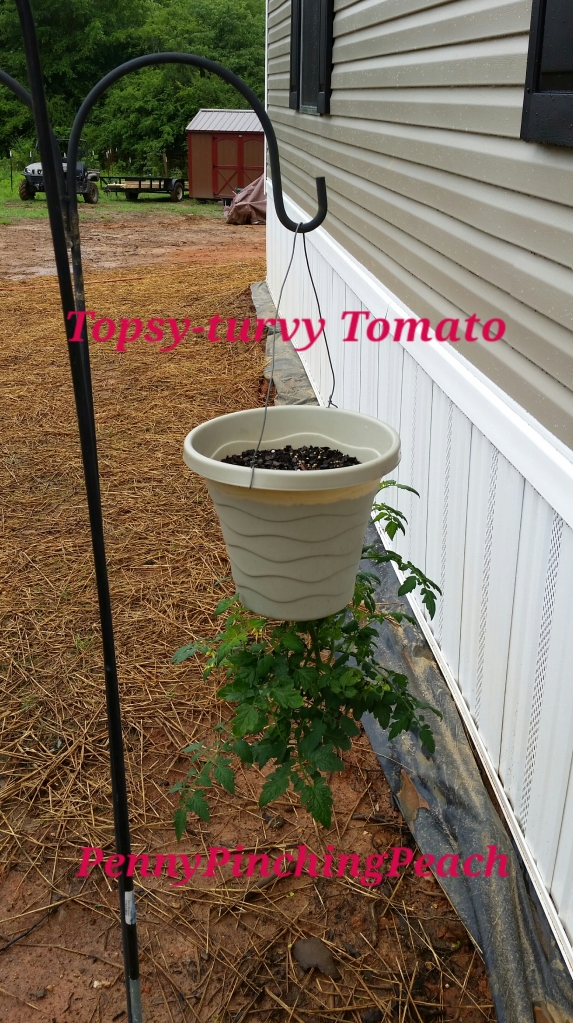
We used some nice, but inexpensive, plastic pots. My husband drilled a small hole in each side and ran a wire through it to the length we wanted our pots to hang at. He then drilled a much larger hole in the bottom of the bottom for our tomato plant to come out of. We lined the bottom with coconut liner, and cut an x in the bottom if needed.

Situate your young plant carefully through the hole out the bottom, angling it slightly in the direction of where the sun will come from most while it is hanging. Fill around and above it with potting soil. Hang your plant and water thoroughly.

If you have a porch like we used to have, I love using this type of Hanging Plant Hook. If you want to put it in the yard, use something like this Standing Pole Plant Hook.
Once the plant starts flowering, I always go over the plant and pinch of the little “sucker stems” growing at the root of the main stems and add some crushed egg shells and a bit of plant food of some sort, like manure tea. This gives them an extra boost of nutrients at a crucial time.

DIY Topsy Turvy Tomato and Friends

DIY Topsy Turvy Tomato and Friends

If you notice the marigolds in the picture with my young tomato plants, that is not just for prettiness.

It’s tried and true companion planting. Many pests who like to chow down on tomatoes are repelled by marigolds, so they make a great garden partnership. My mom was planting marigolds and tomatoes together when I was little, and we’ve always had less pest than many who don’t plant that way.
Has anyone else grown plants topsy turvy style? What kind? How did it work out for you? If you haven’t tried it, are you planning to now? 🙂

Interested in food preservation? Read about my post about freezing peppers.


4 Comments

Chickens on the Cheap, Part 1

Chickies!

Chickens on the cheep, cheep, cheep! Raising chickens on a budget on your back yard homestead!

This post is from a couple of Easters ago. I don’t advocate chicks as gift “just for Easter”, but this worked out perfectly for us because we did want the feathered friends as egg laying adults. 🙂

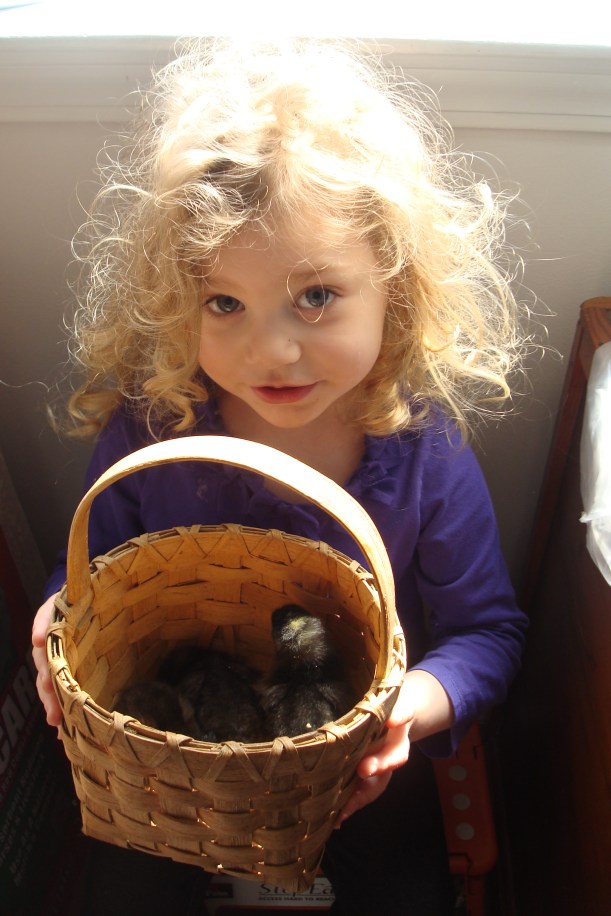
We got five fluffy baby pullet chicks this spring!

Our daughter was thrilled, I was excited to have chickens for the first time in years and years, and my husband was fascinated by the whole process of raising a farm type critter. This was a new adventure for our little family!

Alot of folks get those cute Easter chicks without a clue or thought of what to do with them.

I got my hens as chicks so they would be friendly backyard pets. I chose the breeds for the dual purpose of being pets and good egg layers. We got three Barred Rock hens because they are both calm and very productive layers. We got two Aracauna hens because they lay Easter egg colored eggs and are moderately high producers.

We had a chicken house that we found on an online yardsale set up in our back yard before we brought them home, although they had to stay in a big box under a heat lamp inside for a few weeks. We had fencing materials and a plan for making a ramp down from the coop into the little pen, which my hubby did for me when the chicks were big enough to need the space. If you want chickens yourself, do your research, make your plans for their long term care and prepare yourself before you bring them home!

Feeding chickens could add up to a huge expense if you don’t do it correctly!

For us, we spend about $12 on a bag of feed for our hens and it lasts about six weeks for our five chickens now that they’re full sized “teenagers”. However, the reason it lasts is because I save scraps for them every day, and have our 3 year old give them their scraps before I pour their feed in. We save things like the chopped up odds & ends from fruits and veggies, stale bread, crushed cereal leftovers, leftover plain pasta pieces, and anything else chickie friendly to chop up for them to gobble up. We also have a compost pile my husband and daughter sometimes dig up worms from to feed to them, and the two of them like to turn over large rocks and boards to collect grubs and worms to feed the feathered fowl as treats. These “extras” not only save us money on their feed bill, but it keeps them much healthier.

Chicks and Princess Peach

Chickies and Chica

Another thing I am doing for the chickens is saving up eggshells, letting them air dry, and crushing them into powder. I let my little girl crush them in a plastic bag with a cup as much as she wants, then I grind them the rest of the way into powder. I’ll be adding this to my hen feed as soon as they start laying eggs, as it is a cheap way to help them get their calcium. They’re due to start laying…well….any time in the next month or so, really. 🙂

A misconception alot of folks have that surprises me every time is that you need a rooster so the hens can lay eggs. You don’t. You only need a rooster if you want the eggs to be fertilized so you can hatch your own chicks. A rooster in the back yard would be loud and obnoxious. Hens are pretty quiet, just clucking most of the time with an occasional cackle, and are actually less likely to disturb anyone than having a cat. My mom got our first hens while we were living in a subdivision, and all three of the neighbors connected to our back yard loved them!

You don’t need alot of time, space or money to keep a few laying hens.

Teenaged chickies getting scraps.

“Teenaged” chickies getting scraps.

Just do your homework and prepare yourself before you bring them home, and you’ll do just fine. They’re cute, fun, teach kiddos responsibility, and the fresh home laid eggs are absolutely amazing and healthy. I loved raising chickens when I was growing up, and am thrilled to be able to share that with my munchkins now.

Is anyone else doing some backyard (or full scale) homesteading? You might be interested in my creative hanging planters!


8 Comments

Let’s Celebrate Food Day!!!

Garden Fresh Jalapenos

Garden Fresh Jalapenos

You love food, I love food, we all love food! I mean, who can help it? We’ve all gotta eat! October 24th is an extra special day in the world of food. It’s not only the official celebration of Food Day, but also the birthday of one of my all-time favorite food lovers- my dear ol’ Dad! It’s only fitting that he was born on the day we celebrate one of his most beloved things (other than his darling children, of course! 😉 ). He sure loves himself some good vittles! Love you and a big happy birthday holler, Daddy!

Food Day isn’t just about any food. It’s about making an effort to eat real, healthy food and about the people who work hard to make sure these choices are readily available. It’s about encouraging families to choose more natural and less processed. According to http://www.foodday.org : In 2014, Food Day will have a special focus on food access and justice for food and farm workers.

Jalapeno Poppers

Jalapeno Poppers

I just finally got my late autumn garden of kale, broccoli and butter lettuce planted a couple of days ago to give us a continued supply of some fresh healthy green veggies for a couple more months while produce is getting more and more expensive. I wanted to plant spinach, too, but I waited too long to start the seeds and couldn’t find the plants anywhere locally. I’d love to have more in, but life interfered with my larger plans for this year. The only thing still producing well from my summer garden is the jalapenos you see pictured. They are doing amazingly well! 🙂 If you want to know how I made those yummy unfried poppers in the picture, just click the photo for instructions.

What are you doing to make healthy food choices for your family? How knowledgeable do you think you are about things related to the growth and production of the food we eat? Take this quiz, and let me know how you did! http://www.foodday.org/food_literacy_quiz I took it, and got 12 out of 15 right. A couple of my wrong answers surprised me! Can you outdo me?

The friendly face of Food Day. Happy birthday, Dad! :)

The friendly face of Food Day. Happy birthday, Dad! 🙂


3 Comments

Freezing Peppers

2017-03-22 21.54.12

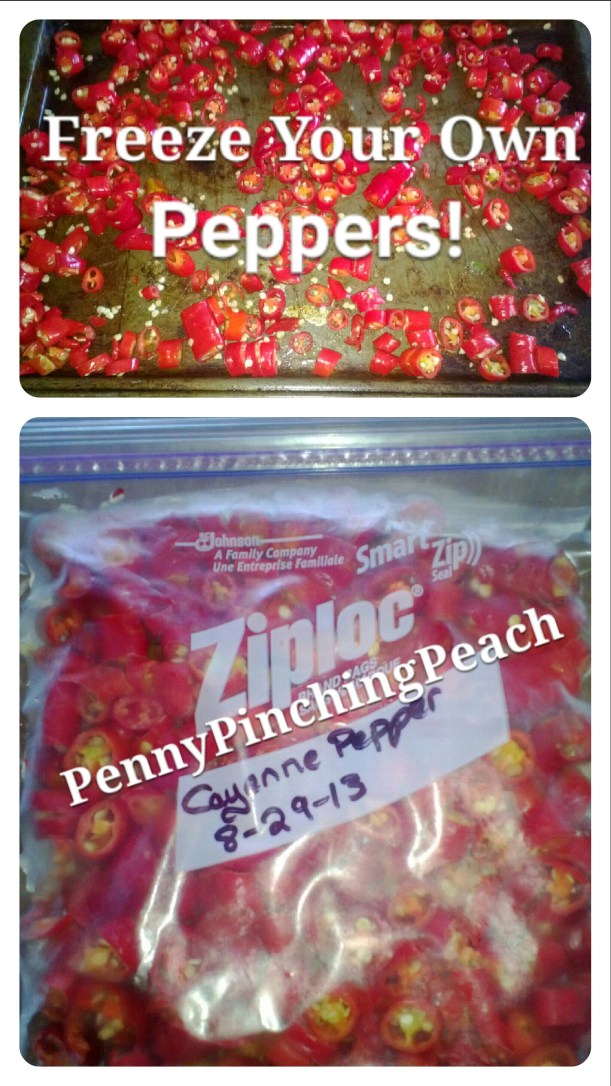
Freezing Your Own Cayenne Peppers!

I always I try to stretch a dollar while feeding my family with healthy foods is to keep a garden and put up what we won’t eat while fresh for later.

To be honest, I haven’t progressed to the point of having a humongous garden to provide limitless bounty to can for stocking a huge pantry of shelves I don’t yet have. I was raised doing it, but haven’t been able to do it myself yet as an adult on my own. This year I have a little semi raised bed measuring roughly 16′ by 3′, plus a few potted veggies. It won’t provide enough food to last us year round, but it does provide a large chunk of our produce for the spring and summer, plus a bit to put up for later.

*May contain affiliate links,  which help my little family without costing yours any extra.*

One of my favorite vegetables I put up last year was excess peppers.

Order non GMO seeds and supplies using the coupon code SAVE10NOW for 10% off at SeedsNow!

Since I don’t get enough of anything at once to make a big batch of anything, I tend to freeze things more than canning. I can always can most things later if I get enough of something frozen and want to make a sauce or jelly or some such delicacy out of them. I froze bell peppers and cayenne peppers to use in cooking.

Wanna know how to do it yourself? Here’s how I froze my peppers…

2017-03-22 21.56.33

Preserving Your Own Bell Peppers!

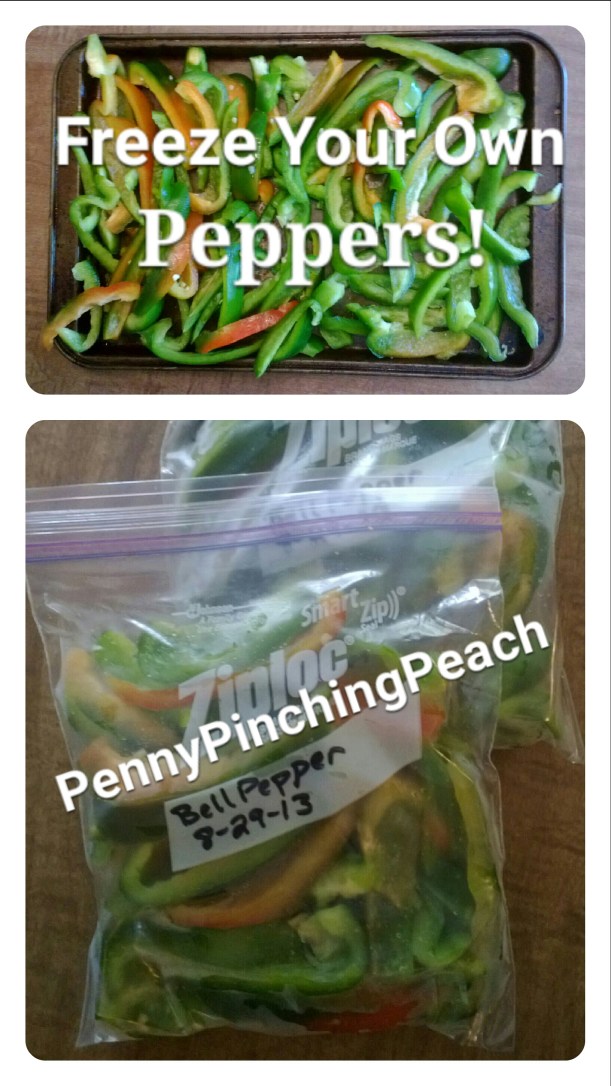
Wash and seed peppers, then slice and lay out on cookie sheets. Pop them in the freezer just like that. This step keeps them from clumping together in a big mess in your freezer bags. I left them in for about an hour, then got them out and tossed them into labeled freezer bags. I squeezed out all the air I could before sealing, then laid them flat to freeze. They should keep like this for at least several months. I still have a couple of bags left from last August, and they are fine & dandy.

Which veggies and fruits do you prefer to freeze to keep them fresh & yummy? Which would you like to try freezing, but haven’t yet? Go see how I made some great diy topsy turvy style tomato planters!